How to make a Flask blog in one hour or less
Note
I co-wrote a book, Learning Flask Framework, which describes how to build a blog. Many additional features are discussed, such as adding an administrative dashboard, ajax and APIs, and more. If you find this post interesting and would like to learn more, I suggest you check it out.
For fun, I thought I'd write a post describing how to build a blog using Flask, a Python web-framework. Building a blog seems like, along with writing a Twitter-clone, a quintessential experience when learning a new web framework. I remember when I was attending a five-day Django tutorial presented by Jacob Kaplan-Moss, one of my favorite projects we did was creating a blog. After setting up the core of the site, I spent a ton of time adding features and little tweaks here-and-there. My hope is that this post will give you the tools to build a blog, and that you have fun customizing the site and adding cool new features.
In this post we'll cover the basics to get a functional site, but leave lots of room for personalization and improvements so you can make it your own. The actual Python source code for the blog will be a very manageable 200 lines.
Who is this post for?
This post is intended for beginner to intermediate-level Python developers, or experienced developers looking to learn a bit more about Python and Flask. For the mother of all Flask tutorials, check out Miguel Grinberg's 18 part Flask mega-tutorial.
The spec
Here are the features:
- Entries are formatted using markdown.
- Entries support syntax highlighting, optionally using Github-style triple-backticks.
- Automatic video / rich media embedding using OEmbed.
- Very nice full-text search thanks to SQLite's FTS extension.
- Pagination.
- Draft posts.
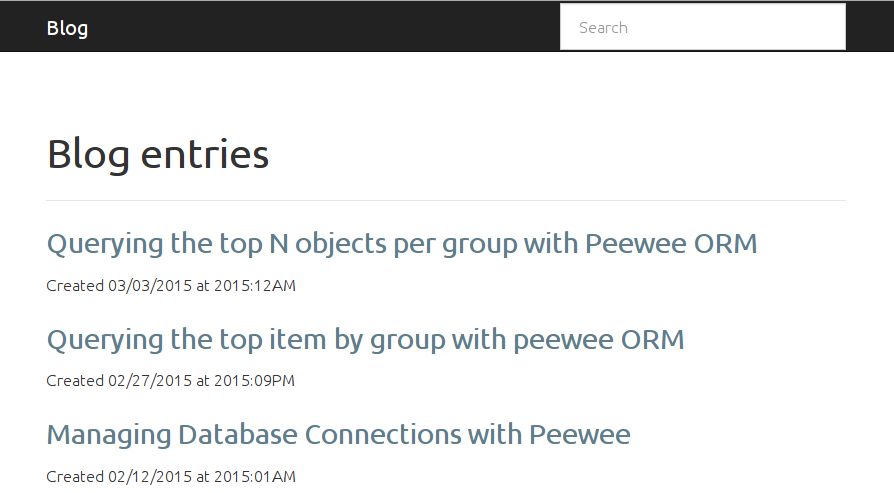
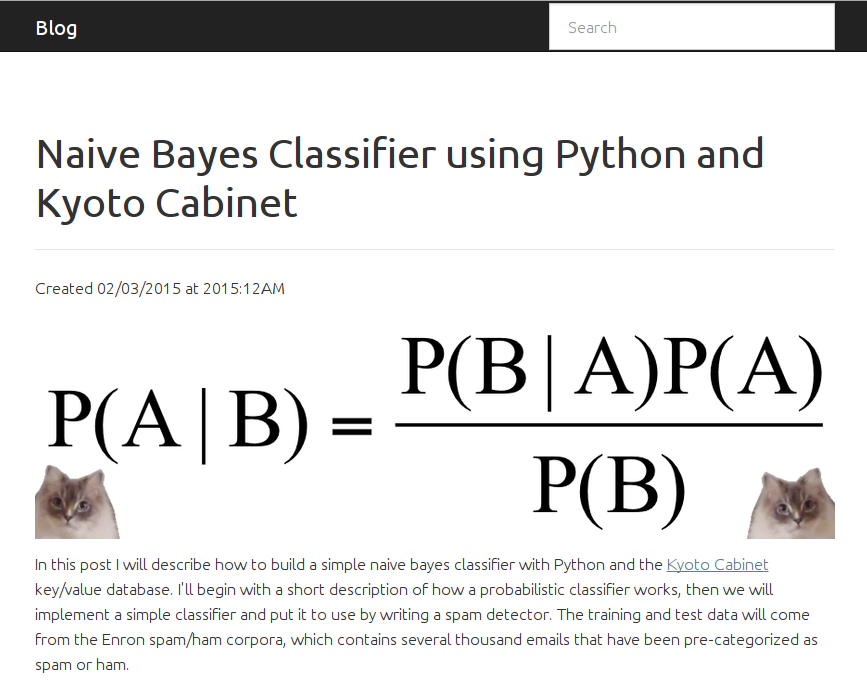
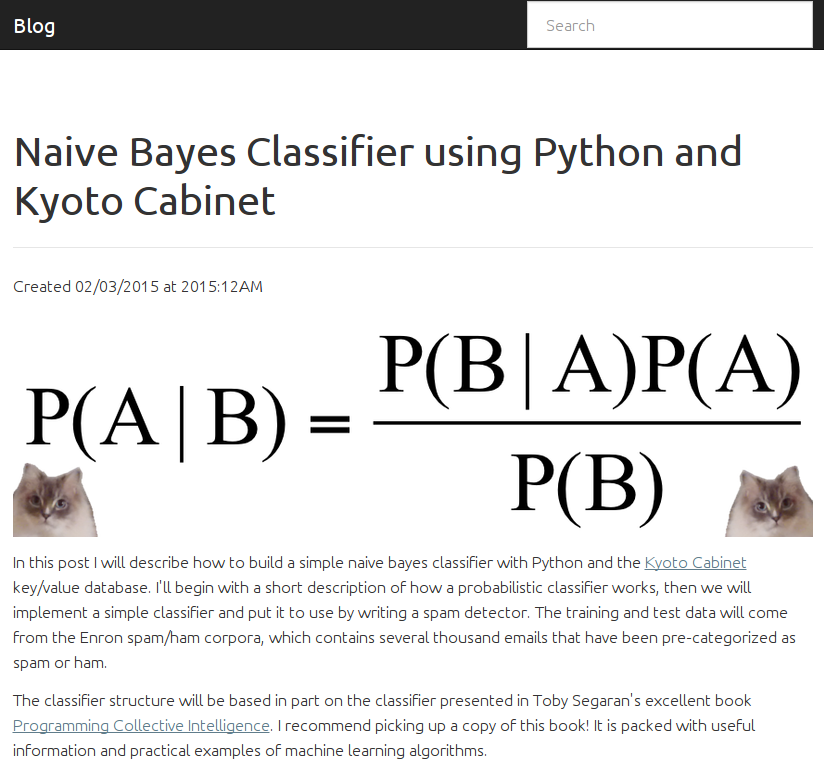
Here is a quick preview of what the blog will look like when we're finished!
Index page
Entry detail page
Getting started
If you'd like to skip the post and go directly to the code, you can find the python app, templates and static media in the peewee examples directory.
To get started, let's create a virtualenv and install the packages we'll be using. If you're not familiar with virtualenv, it is practically a standard library these days, and it is used to create isolated, self-contained Python environments into which you can install packages. Check out the install docs for instructions on installing virtualenv.
For our app we'll need to install the following packages:
- Flask, a lightweight web framework.
- Peewee, for storing entries in the database and executing queries.
- pygments, syntax highlighting with support for a ton of different languages.
- markdown, formatting for our entries.
- micawber, for converting URLs into rich content objects. For example if you wanted to embed a YouTube video, just place the URL to the video in your post and a video player will automagically appear in its place.
- BeautifulSoup, required by micawber for parsing HTML.
$ virtualenv blog
New python executable in blog/bin/python2
Also creating executable in blog/bin/python
Installing setuptools, pip...done.

$ cd blog/
$ source bin/activate
(blog)$ pip install flask peewee pygments markdown micawber BeautifulSoup
...
Successfully installed flask peewee pygments markdown micawber BeautifulSoup Werkzeug Jinja2 itsdangerous markupsafe
Cleaning up...
Our blog app will be a single Python module named app.py. We'll also create some folders for static assets (stylesheets, javascript files) and a folder for HTML templates. I'll cover the templates at the end of the post, and the statics will just be bootstrap.
(blog)$ mkdir app
(blog)$ cd app
(blog)$ touch app.py
(blog)$ mkdir {static,templates}
Configuring the Flask app
Let's start editing app.py and configuring our Flask app. We will configure various objects used by our app like our SQLite database, the OEmbed client, and the Flask app itself. Configuration values can be placed in a separate module, but for simplicity we'll just put them in the same namespace as our app.
# app.py
import datetime
import functools
import os
import re
import urllib

from flask import (Flask, abort, flash, Markup, redirect, render_template,
                   request, Response, session, url_for)
from markdown import markdown
from markdown.extensions.codehilite import CodeHiliteExtension
from markdown.extensions.extra import ExtraExtension
from micawber import bootstrap_basic, parse_html
from micawber.cache import Cache as OEmbedCache
from peewee import *
from playhouse.flask_utils import FlaskDB, get_object_or_404, object_list
from playhouse.sqlite_ext import *

ADMIN_PASSWORD = 'secret'
APP_DIR = os.path.dirname(os.path.realpath(__file__))
DATABASE = 'sqliteext:///%s' % os.path.join(APP_DIR, 'blog.db')
DEBUG = False
SECRET_KEY = 'shhh, secret!'  # Used by Flask to encrypt session cookie.
SITE_WIDTH = 800


app = Flask(__name__)
app.config.from_object(__name__)

flask_db = FlaskDB(app)
database = flask_db.database

oembed_providers = bootstrap_basic(OEmbedCache())
You'll notice that the admin password is stored as a configuration value in plaintext. This is OK for prototyping, but if you end up deploying this app you might consider at least using a one-way hash to store the password.
Defining our database models
I always enjoy defining the database schema for a new project. It's fun to think about modeling the relationships between the different entities, thinking of ways the schema might evolve, how to efficiently support the queries you'll be executing... For our blog project, we'll focus on simplicity, knowing that it'll be easy to extend in the future. Entries will be stored in a single table, and we'll have a separate table for the search index.
The Entry model will have the following columns:
titleslug: URL-friendly representation of the title.content: markdown-formatted entry.published: boolean flag indicating whether the entry is published (visible on site).timestamp: time the entry is created.id: peewee automatically will create an auto-incrementing primary key for us, so we don't need to define this explicitly.
The search index will be stored using the FTSEntry model class:
docid: The primary key of the indexed entry. This field is automatically created on tables using the SQLite full-text-search extension, and supports fast lookups. We will explicitly set it to the value of it's correspondingEntryprimary key, thus acting like a foreign-key.content: Search content for the given entry.
Add the following code after the app configuration and initialization code:
class Entry(flask_db.Model):
    title = CharField()
    slug = CharField(unique=True)
    content = TextField()
    published = BooleanField(index=True)
    timestamp = DateTimeField(default=datetime.datetime.now, index=True)

    def save(self, *args, **kwargs):
        if not self.slug:
            self.slug = re.sub('[^\w]+', '-', self.title.lower())
        ret = super(Entry, self).save(*args, **kwargs)

        # Store search content.
        self.update_search_index()
        return ret

    def update_search_index(self):
        search_content = '\n'.join((self.title, self.content))
        try:
            fts_entry = FTSEntry.get(FTSEntry.docid == self.id)
        except FTSEntry.DoesNotExist:
            FTSEntry.create(docid=self.id, content=search_content)
        else:
            fts_entry.content = search_content
            fts_entry.save()


class FTSEntry(FTSModel):
    content = SearchField()

    class Meta:
        database = database
The above code defines two model classes and their respective fields. The Entry model has two additional methods which are used to ensure that when an entry is saved, we also generate a slug from the title, and update the search index. You may wonder why we didn't put a foreign key on the FTSEntry model -- the reason we did not is because SQLite virtual tables do not support indexes or constraints, so a foreign key would be moot. Furthermore, all columns (except docid) are treated as text by the full-text-search extension. So in order to achieve fast lookups, we will be using the FTSEntry.docid column as if it were a foreign-key to the Entry table.
Also note that we set up some fields with index=True. This tells peewee to create a secondary index on those columns, which will speed up some queries we'll be running in our app.
Initialization code
Now that we have our models defined, let's add app initialization code, a hook for handling 404s, and a template filter we'll use later on. When we start the app in debug mode by running it from the command-line, we'll automatically create the database tables if they don't exist, and start the development server. Add the following code to the bottom of the file:
@app.template_filter('clean_querystring')
def clean_querystring(request_args, *keys_to_remove, **new_values):
    querystring = dict((key, value) for key, value in request_args.items())
    for key in keys_to_remove:
        querystring.pop(key, None)
    querystring.update(new_values)
    return urllib.urlencode(querystring)

@app.errorhandler(404)
def not_found(exc):
    return Response('<h3>Not found</h3>'), 404

def main():
    database.create_tables([Entry, FTSEntry])
    app.run(debug=True)

if __name__ == '__main__':
    main()
If you'd like, you can try running your app now. We won't be able to make any requests since there are no views yet, but your database will be created and you should see the following output:
$ cd blog  # switch to the blog virtualenv directory.
$ source bin/activate  # activate the virtualenv
(blog)$ cd app  # switch to the app subdirectory
(blog)$ python app.py
 * Running on http://127.0.0.1:5000/ (Press CTRL+C to quit)
 * Restarting with reloader
Adding login and logout functionality
In order to create and edit posts, as well as to manage the list of drafts, we will add some very simple authentication to the blog site. Flask has a cookie-based session object which we'll use to store whether a user has authenticated with the site. A common pattern with Flask apps is to use decorators to protect views that require authentication. We'll add a login_required() decorator and views for logging in and out.
To keep things simple, we'll just hard-code the admin password into the application. You may have noticed that we defined the ADMIN_PASSWORD at the top of the module along with the other app configuration data.
Add the following code after the model definitions:
def login_required(fn):
    @functools.wraps(fn)
    def inner(*args, **kwargs):
        if session.get('logged_in'):
            return fn(*args, **kwargs)
        return redirect(url_for('login', next=request.path))
    return inner

@app.route('/login/', methods=['GET', 'POST'])
def login():
    next_url = request.args.get('next') or request.form.get('next')
    if request.method == 'POST' and request.form.get('password'):
        password = request.form.get('password')
        if password == app.config['ADMIN_PASSWORD']:
            session['logged_in'] = True
            session.permanent = True  # Use cookie to store session.
            flash('You are now logged in.', 'success')
            return redirect(next_url or url_for('index'))
        else:
            flash('Incorrect password.', 'danger')
    return render_template('login.html', next_url=next_url)

@app.route('/logout/', methods=['GET', 'POST'])
def logout():
    if request.method == 'POST':
        session.clear()
        return redirect(url_for('login'))
    return render_template('logout.html')
Note that the login and logout views do different things depending on whether the request was a GET or a POST (form submission). When logging in, if you simply navigate to /login/ in your browser, you will see a rendered template with a password field. When you submit the form, though, the view will check the submitted password against the configured ADMIN_PASSWORD, and conditionally redirect or display an error message.
Implementing views
Now that we've laid the foundation of our site, we can start working on the views that will actually be used to display and manage blog entries. Thanks to some of the helpers in the flask_utils playhouse module, the view code will be very minimal.
Index, Search and Drafts
Let's start with the homepage index view. This view will list entries ordered newest-to-oldest, paginated to display 20 posts at a time. We'll use the object_list helper from flask_utils, which accepts a query and returns the requested page of objects. Additionally, the index page will allow users to perform searches.
Add the following code below the login and logout views:
@app.route('/')
def index():
    search_query = request.args.get('q')
    if search_query:
        query = Entry.search(search_query)
    else:
        query = Entry.public().order_by(Entry.timestamp.desc())
    return object_list('index.html', query, search=search_query)
If a search query is present, as indicated by the GET argument q, we will call the Entry.search() classmethod. This method will use the SQLite full-text search index to query for matching entries. SQLite's full-text search supports boolean queries, quoted phrases, and more.
You may notice that we're also calling Entry.public() if no search is present. This method will return only published entries.
To implement these, add the following classmethods to the Entry class:
@classmethod
def public(cls):
    return Entry.select().where(Entry.published == True)

@classmethod
def search(cls, query):
    words = [word.strip() for word in query.split() if word.strip()]
    if not words:
        # Return empty query.
        return Entry.select().where(Entry.id == 0)
    else:
        search = ' '.join(words)

    return (Entry
            .select(Entry, FTSEntry.rank().alias('score'))
            .join(FTSEntry, on=(Entry.id == FTSEntry.docid))
            .where(
                (Entry.published == True) &
                (FTSEntry.match(search)))
            .order_by(SQL('score')))
Let's dig into the search() method briefly. What we're doing is querying the Entry table and joining on the FTSEntry virtual table, which stores the search index of our blog entries. SQLite's full-text search implements a custom MATCH operator, which we'll use to match indexed content against the search query. For more details, check out my SQLite full-text search with Python post.
Because we're only displaying published entries on the index and search results, we'll need a way for logged-in users to manage the list of draft posts. Let's add a protected view for displaying draft posts. We'll add another classmethod to Entry, and add new view below the existing index() view.
Add the following method to Entry:
@classmethod
def drafts(cls):
    return Entry.select().where(Entry.published == False)
Add the following view below the index view. This view will use the login_required decorator to ensure only logged-in users can access it:
@app.route('/drafts/')
@login_required
def drafts():
    query = Entry.drafts().order_by(Entry.timestamp.desc())
    return object_list('index.html', query)
Entry detail page
In order to have nice URLs, we'll use a URL-friendly representation of an entry's title to identify each Entry. You might recall that we overrode the Entry.save() method to populate the slug field with a URL-friendly title. Example title and slug might be:
- "Extending SQLite with Python" -> extending-sqlite-with-python
- "How to make a blog using Flask" -> how-to-make-a-blog-using-flask
Our detail view will accept a single parameter, the slug, and then attempt to match that to an Entry in the database. The catch is that if the user is logged-in we will allow them to view drafts, but if the user is not, we will only show public entries.
Add the following view code after the drafts() function:
@app.route('/<slug>/')
def detail(slug):
    if session.get('logged_in'):
        query = Entry.select()
    else:
        query = Entry.public()
    entry = get_object_or_404(query, Entry.slug == slug)
    return render_template('detail.html', entry=entry)
The get_object_or_404 helper is defined in the playhouse flask_utils module and, if an object matching the query is not found, will return a 404 response.
Rendering entry content
In order to convert the Entry's markdown-formatted text into HTML in the detail page, we'll add an additional property to the Entry class. This property will turn the markdown content into HTML and convert media links into embedded objects (i.e. a YouTube URL becomes a video player).
Add the following property to the Entry model:
@property
def html_content(self):
    hilite = CodeHiliteExtension(linenums=False, css_class='highlight')
    extras = ExtraExtension()
    markdown_content = markdown(self.content, extensions=[hilite, extras])
    oembed_content = parse_html(
        markdown_content,
        oembed_providers,
        urlize_all=True,
        maxwidth=app.config['SITE_WIDTH'])
    return Markup(oembed_content)
The Markup object tells Flask that we trust the HTML content, so it will not be escaped when rendered in the template.
Creating and editing entries
Now that we've covered the views for displaying entries, drafts and detail pages, we need two new views for creating and editing entries. These views will have a lot in common, but for clarity we'll implement them as two separate view functions.
The code is hopefully fairly self-explanatory, but to give it some color, basically we're going to do different things depending on the request method. If the request method is GET, then we will display a form allowing the user to create or edit the given entry. If the method is POST we will assume they submitted the form on the page (which we'll get to when we cover templates), and after doing some simple validation, we'll either create a new entry or update the existing one. After saving the entry, we will either redirect to the detail page, or redirect to edit page depending on whether the entry is published or not.
Here is the code for create, which should be placed immediately before the detail view. This is important because if we didn't put it before detail, then Flask would interpret requests to /create/ as attempting to request the detail page for an entry with the slug create, which we don't want.
@app.route('/create/', methods=['GET', 'POST'])
@login_required
def create():
    if request.method == 'POST':
        if request.form.get('title') and request.form.get('content'):
            entry = Entry.create(
                title=request.form['title'],
                content=request.form['content'],
                published=request.form.get('published') or False)
            flash('Entry created successfully.', 'success')
            if entry.published:
                return redirect(url_for('detail', slug=entry.slug))
            else:
                return redirect(url_for('edit', slug=entry.slug))
        else:
            flash('Title and Content are required.', 'danger')
    return render_template('create.html')
The edit view is similar and can be placed after the detail view. The only difference is that we will call get_object_or_404 to verify that the entry exists:
@app.route('/<slug>/edit/', methods=['GET', 'POST'])
@login_required
def edit(slug):
    entry = get_object_or_404(Entry, Entry.slug == slug)
    if request.method == 'POST':
        if request.form.get('title') and request.form.get('content'):
            entry.title = request.form['title']
            entry.content = request.form['content']
            entry.published = request.form.get('published') or False
            entry.save()

            flash('Entry saved successfully.', 'success')
            if entry.published:
                return redirect(url_for('detail', slug=entry.slug))
            else:
                return redirect(url_for('edit', slug=entry.slug))
        else:
            flash('Title and Content are required.', 'danger')

    return render_template('edit.html', entry=entry)
Templates
Believe it or not, that is all that's required in terms of Python code! You can compare your finished code with the code in the peewee examples directory. We're now ready to write some templates to go along with all these views. The template layer is a great first place to start with customizations, so the templates presented will be very basic and use bootstrap for the styles.
Rather than present all the templates, which you can find in this example app, I'll hit some of the interesting or tricky parts.
Jinja2 is a very popular Python templating engine that's used with Flask apps. One of the key reasons to use templates is code re-use. Typically this means a combination of template inheritance and template includes. Inheritance means you'll define a base template that defines the shell of your site and blocks out places for titles, navigation links, body content, etc. You can have multiple base templates -- this is common in bigger apps -- but for our blog we'll just have one. The other way to re-use template code is through template includes. Template includes allow us to define a fragment of HTML code we want to re-use multiple places and then include it wherever we need it. The pagination links we'll be adding to the entry index will be an include so it'll be easy to add pagination elsewhere in the future.
The base template is the largest of the templates so I'm not going to include it here, but what it does is define the HTML structure of the site and defines several blocks which we'll override in sub-templates:
title: controls the title of the page (i.e. what's displayed in the tab or title-bar).content_title: controls the title you see in the actual page, which is wrapped in an<h1>header tag.content: controls the main content area of the page, where we'll be displaying entries and such.
index.html

Let's take a look at the index template. It begins by indicating that it extends base.html, then defines overrides for our three main blocks. Because this template is used for both the default index list as well as the search results, we'll add conditional statements to check if a search is present. If you refer back to the views, you might note that any user search query is passed into the template context when the index is rendered.
{% extends "base.html" %}

{% block title %}Blog entries{% endblock %}

{% block content_title %}{% if search %}Search "{{ search }}"{% else %}Blog entries{% endif %}{% endblock %}

{% block content %}
  {% for entry in object_list %}
    <h3>
      <a href="{% if entry.published %}{{ url_for('detail', slug=entry.slug) }}{% else %}{{ url_for('edit', slug=entry.slug) }}{% endif %}">
        {{ entry.title }}
      </a>
    </h3>
    <p>Created {{ entry.timestamp.strftime('%m/%d/%Y at %G:%I%p') }}</p>
  {% endfor %}
  {% include "includes/pagination.html" %}
{% endblock %}
A couple things worth noting:
- The
object_listcontext variable is added by theobject_listhelper function we called in theindexview. It contains a list of blog entries. - If a search is present, we display a different content title indicating what the user searched for.
- We are calling the
strftime()function on the entry's timestamp to display a friendly version of the timestamp. - We are including the pagination partial at the bottom of the page.
detail.html
The detail template will display the entry's title and the HTML content that results from converting the markdown to HTML and processing any embeddable objects. In the base template there is an extra block for adding links to the navbar, which we'll use to add an "Edit entry" link if the user is logged-in. Here is the code:
{% extends "base.html" %}

{% block title %}{{ entry.title }}{% endblock %}

{% block content_title %}{{ entry.title }}{% endblock %}

{% block extra_header %}
  {% if session.logged_in %}
    <li><a href="{{ url_for('edit', slug=entry.slug) }}">Edit entry</a></li>
  {% endif %}
{% endblock %}

{% block content %}
  <p>Created {{ entry.timestamp.strftime('%m/%d/%Y at %G:%I%p') }}</p>
  {{ entry.html_content }}
{% endblock %}
edit.html

The final template I'll cover here is the template for editing an entry. This template uses Bootstrap conventions for defining the form fields, so there's a bit of boilerplate that's safe to ignore. Note that we are prepopulating the form fields with data taken either from the previous POST request (if the form was submitted with errors), or the entry you are editing.
{% extends "base.html" %}

{% block title %}Edit entry{% endblock %}

{% block content_title %}Edit entry{% endblock %}

{% block content %}
  <form action="{{ url_for('edit', slug=entry.slug) }}" class="form-horizontal" method="post">
    <div class="form-group">
      <label for="title" class="col-sm-2 control-label">Title</label>
      <div class="col-sm-10">
        <input class="form-control" id="title" name="title" type="text" value="{{ request.form.get('title', entry.title) }}">
      </div>
    </div>
    <div class="form-group">
      <label for="Content" class="col-sm-2 control-label">Content</label>
      <div class="col-sm-10">
        <textarea class="form-control" id="content" name="content" style="height: 300px;">{{ request.form.get('content', entry.content) }}</textarea>
      </div>
    </div>
    <div class="form-group">
      <div class="col-sm-offset-2 col-sm-10">
        <div class="checkbox">
          <label>
            <input {% if entry.published %}checked="checked" {% endif %}name="published" type="checkbox" value="y"> Published?
          </label>
        </div>
      </div>
    </div>
    <div class="form-group">
      <div class="col-sm-offset-2 col-sm-10">
        <button class="btn btn-primary" type="submit">Save</button>
        <a class="btn btn-default" href="{{ url_for('index') }}">Cancel</a>
      </div>
    </div>
  </form>
{% endblock %}
Static media
You can use bootstrap, but if you'd like to use the styles from the screenshots at the beginning of the post, you can find them in the example app.
Running the code
Assuming you have the app, templates and static media saved, you should now be ready to run the app using the development server. To run the app, just activate the virtualenv and execute app.py:
$ cd blog
$ source bin/activate
(blog)$ cd app/
(blog)$ python app.py
 * Running on http://127.0.0.1:5000/ (Press CTRL+C to quit)
 * Restarting with reloader
You should now be able to browse to http://127.0.0.1:5000/ and view your blog!
Improving the blog
Let's talk about things you can do to improve the site.
- Add a comments section to each entry. Comments should be stored in a separate model that relates back to an Entry. You can display a form on the bottom of each Entry detail page and have it POST to a special view that creates a new comment.
- Allow entries to have tags and create URLs for browsing by tag (kinda like this page).
- Add an RSS feed to your site.
- Add a contact form that sends email messages. Bonus points for adding spam detection to this form.
- Add a
Usermodel and store usernames and hashed passwords in the database, then use these Users to improve the authentication system. - Add support for image uploads and a way to easily embed them in your entries. You can even just upload them then generate a markdown image link!
- If you anticipate lots of traffic, you might investigate ways to cache static parts of the site.
- Use SQLCipher to keep your database encrypted!
- Deploy your site to heroku using the free-tier or AWS using a WSGI server. There are tons of great posts about deploying Python apps, google is your friend.
Thanks for reading
Thanks for taking the time to read this post, I hope you found it interesting and helpful! If you have any questions or comments, feel free to leave a comment or contact me directly.
I've written a book on using Flask. If you enjoyed this post, the book covers building a blog in much more detail and with greater depth. The book is titled Learning Flask Framework.
Here are some links which you may find helpful:
- Source code to the blog.
- Peewee documentation
- Building a twitter clone with Flask and Peewee
- Team Treehouse Python Database tutorial
- More posts about Flask
Here are some blog posts on related topics:
- Saturday morning hacks: Building an analytics app with Flask
- Structring Flask apps, a how-to for those coming from Django
- Saturday morning hacks: a little note-taking app with Flask
- Using Flask blueprints to build a bookmarking app, a pastebin and a wiki
- Creating a personal password manager
- SQLite full-text search with Python
- Encrypted SQLite databases with Python and SQLCipher
Comments (1)
Commenting has been closed.
Kyle | mar 15 2015, at 11:45am
This was incredibly useful. I've recently started learning flask. It's an awesome framework.