Saturday morning hacks: Revisiting the notes app

My post from last month, Saturday Morning Hack, a Little Note-Taking App with Flask, was pretty well-received. Since I've made a number of improvements to the app, I thought I would write one more post to share some of the updates I've made to this project, in the hopes that they may be of interest to you.
A live demo is up and running on Python Anywhere, so feel free to check that out before continuing on with the post: http://beetlejuicer.pythonanywhere.com/
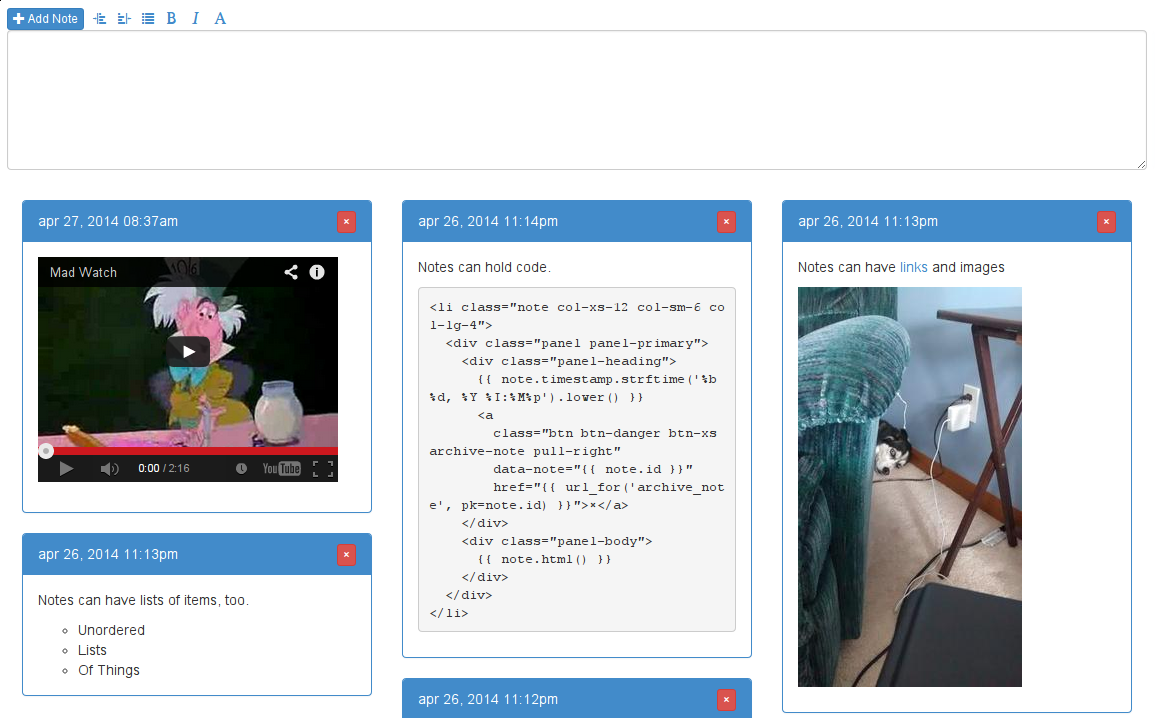
To briefly recap the previous post, I discussed how I built a lightweight note-taking app which I could use from my phone or desktop. It has a nice ajax-ey interface and some simple markdown helpers written with javascript. In addition to supporting markdown, it also supports oembed for automatically embedding YouTube videos and the like. Here is what it looked like when we left off a few weeks ago:
And this is how it looks now!
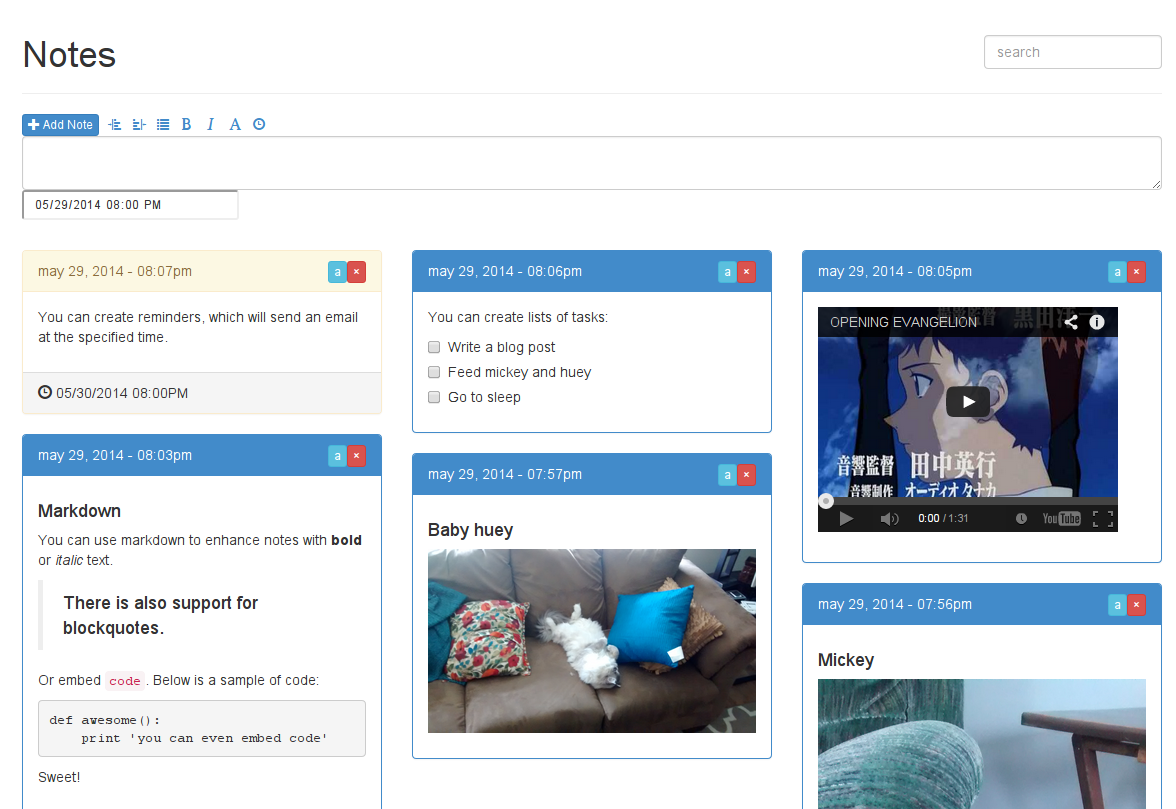
So what's new? Well, I've made a couple changes under-the-hood, and added some entirely new features to the UI.
- Allow creation of Task Lists with checkbox inputs.
- Create reminders that will send me an email at the appointed time.
- Built a RESTful API to interact with the
Notemodel. Thanks to flask-peewee everything comes "for free". - Added search.
- Added pagination (using Ajax).
This was super fun to hack on so I thought I'd share the new code and describe how I added these features. Honestly, I didn't really end up adding much in terms of implementation. Huey handles scheduling and sending the email reminders, even automatically retrying messages that fail to send. Similarly, Flask-Peewee's REST API provides search and pagination out-of-the-box, so all I had to do was write the JavaScript to communicate with it. Thanks to these libraries, I was able to focus on the things that made this project unique, and hopefully you enjoy reading about the code.
Note
If you don't have the code from the original post, you can find it in this gist:
https://gist.github.com/coleifer/632d3c9aa6b2ea519384
If you'd like to skip the post and get straight to the code, here is the code for the updated version:
Here is the original bill of materials for the project:
- Flask, a small Python web framework.
- peewee, an expressive ORM.
- micawber for embedding rich content.
- BeautifulSoup for parsing HTML.
- markdown, a simple markup language.
- Bootstrap (zip)
- jQuery
- imagesloaded, fires an event when all the images on the page are loaded -- used by masonry.
- masonry, lays out the notes in a pinterest-style grid.
To this list we will be adding:
- huey, a task queue.
- flask-peewee, a flask extension for building RESTful APIs (among other things).
- redis and redis-py to provide the task queue (optional, huey works with sqlite3 as well).
With those installed, let's get started!
Tasks and Reminders
Almost as soon as I finished the first version of the note-taking app, I realized that there were two features that would dramatically increase its usefulness to me: to-do lists and reminders.
I'll start with a discussion of the changes I made to the peewee database models. I added two new features that required schema changes: tasks and reminders. Tasks are lists of check-able boxes that appear along with a note (like a to-do list), and reminders allow a note to be emailed to me automatically at an appointed time.
Tasks are stored in a related table and consist of a title, an ordering (so tasks are displayed in the order they are entered), and a boolean value to indicate whether the task has been completed. Here is the task model:
class Task(Model):
    note = ForeignKeyField(Note, related_name='tasks')
    title = CharField(max_length=255)
    order = IntegerField(default=0)
    finished = BooleanField(default=False)

    class Meta:
        database = db

    def html(self):
        return rich_content(self.title)
The rich_content() helper runs a chunk of text through markdown and oembed and returns the resulting HTML:
def rich_content(content, maxwidth=300):
    html = parse_html(
        markdown(content),
        oembed,
        maxwidth=maxwidth,
        urlize_all=True)
    return Markup(html)
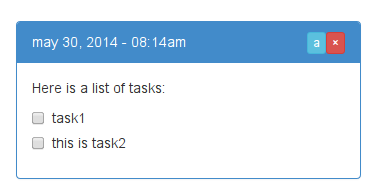
Tasks are created by placing an @ symbol at the beginning of the line I wish to become a task. So this:
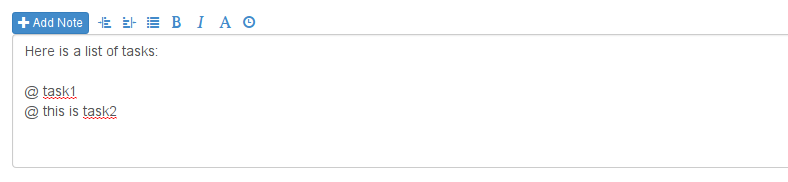
Becomes this:
Reminders were implemented by adding columns to the Note table to track when to send the reminder, and whether the reminder has been sent or not. I chose to use huey, a lightweight python task queue, for sending the reminders. Reminders are created by clicking the clock icon and entering a date and time:

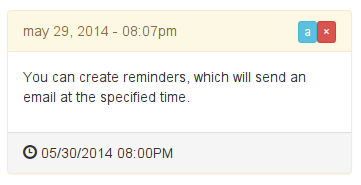
When a note has a reminder attached, the reminder time will be displayed in the note's footer. Reminders appear yellow in the notes list to increase their visual impact:
The Note model
Below is the code for the updated Note model. When a note is saved, tasks are created by splitting the content and extracting lines that begin with the @ symbol. In addition, if the note has a reminder timestamp present, a task will be scheduled to send the reminder.
class Note(Model):
    STATUS_VISIBLE = 1
    STATUS_ARCHIVED = 2
    STATUS_DELETED = 9

    content = TextField()
    timestamp = DateTimeField(default=datetime.datetime.now)
    status = IntegerField(default=STATUS_VISIBLE, index=True)
    reminder = DateTimeField(null=True)
    reminder_task_created = BooleanField(default=False)
    reminder_sent = BooleanField(default=False)

    class Meta:
        database = db

    def html(self):
        return rich_content(self.content)

    def is_finished(self):
        if self.tasks.exists():
            return not self.tasks.where(Task.finished == False).exists()

    def get_tasks(self):
        return self.tasks.order_by(Task.order)

    def parse_content_tasks(self):
        # Split the list of tasks from the surrounding content.
        content = []
        tasks = []
        for line in self.content.splitlines():
            if line.startswith('@'):
                tasks.append(line[1:].strip())
            else:
                content.append(line)
        return '\n'.join(content), tasks

    def save(self, *args, **kwargs):
        # Split out the text content and any tasks.
        self.content, tasks = self.parse_content_tasks()

        # Determine if we need to set a reminder.
        set_reminder = self.reminder and not self.reminder_task_created
        self.reminder_task_created = True

        # Save the note.
        ret = super(Note, self).save(*args, **kwargs)

        if set_reminder:
            # Set a reminder to go off by enqueueing a task with huey.
            send_note_reminder.schedule(args=(self.id,), eta=self.reminder)
        if tasks:
            # Store the tasks.
            Task.delete().where(Task.note == self).execute()
            for idx, title in enumerate(tasks):
                Task.create(note=self, title=title, order=idx)
        return ret

    @classmethod
    def public(cls):
        return (Note
                .select()
                .where(Note.status == Note.STATUS_VISIBLE)
                .order_by(Note.timestamp.desc()))
I've also written a huey task that will send the reminder email at the appointed time. Huey does all the hard work: scheduling the task, running it, and even automatically retrying the task in the event an error occurs sending the email.
@huey.task(retries=3, retry_delay=60)
def send_note_reminder(note_id):
    with database.transaction():
        try:
            note = Note.get(Note.id == note_id)
        except Note.DoesNotExist:
            app.logger.info(
                'Attempting to send reminder for note id=%s, but note '
                'was not found in the database.', note_id)
            return

        if note.status == Note.STATUS_DELETED:
            app.logger.info('Attempting to send a reminder for a deleted '
                            'note id=%s. Skipping.', note_id)
            return

        try:
            # SEND AN EMAIL USING WHATEVER IMPLEMENTATION YOU PREFER.
            # You could also replace this with an SMS, tweet, whatever.
            some_mailer.send(
                to=app.config['REMINDER_EMAIL'],
                subj='[notes] reminder',
                body=note.content)
        except:
            app.logger.info('Sending reminder failed for id=%s.', note_id)
            raise
        else:
            note.reminder_sent = True
            note.save()
In order to use huey in our project, we need to put a Huey instance in our app.py module:
# Add the following lines to the end of app.py
# Using huey with Redis:
from huey import RedisHuey
huey = RedisHuey()

# Using huey with sqlite3:
from huey import SqliteHuey
huey = SqliteHuey(location=os.path.join(APP_ROOT, 'huey.db'))
The huey consumer runs as a separate process, scheduling and executing tasks asynchronously. Check the documentation for instructions on setting it up.
Flask-Peewee and REST
Flask-Peewee, despite having languished a bit over the past year, is still pretty useful for throwing together a simple REST API. I decided to expose the Note model using a basic REST API, and then implement the saving and archiving functionality with a few simple JavaScript calls. Flask-peewee provides a number of desirable features out-of-the-box, saving me a lot of work:
- Pagination
- Filtering (which I used to implement search)
- Authentication
- Serialization of notes and Deserialization of POST requests
It's been some time since I wrote anything new with Flask-Peewee, but it was refreshingly easy to get the API up and running. After installing with pip, I created an api module and added the following code. I've overridden the NoteResource.prepare_data() method so I can includes an HTML representation of each Note along with the JSON data.
# api.py
from flask import render_template
from flask_peewee.rest import Authentication
from flask_peewee.rest import RestAPI
from flask_peewee.rest import RestResource

from app import app
from models import Note
from models import Task


# Allow GET and POST requests without requiring authentication.
auth = Authentication(protected_methods=['PUT', 'DELETE'])
api = RestAPI(app, default_auth=auth)

class NoteResource(RestResource):
    fields = ('id', 'content', 'timestamp', 'status')
    paginate_by = 30

    def get_query(self):
        return Note.public()

    def prepare_data(self, obj, data):
        data['rendered'] = render_template('note.html', note=obj)
        return data

class TaskResource(RestResource):
    paginate_by = 50

api.register(Note, NoteResource)
api.register(Task, TaskResource)
In order to make use of the new REST API, we need to import it in the app's entry-point, main.py and call the setup() method to register the URL routes:
# main.py
from app import app
from models import Note
from models import Task
from api import api
import views

api.setup()

if __name__ == '__main__':
    Note.create_table(True)
    Task.create_table(True)
    app.run(debug=True)
Now we can access /api/note/ and view the serialized notes:
{
  "meta": {
    "model": "note",
    "next": "",
    "page": 1,
    "previous": ""
  },
  "objects": [
    {
      "content": "Code is available here: https://gist.github.com/coleifer/69ec9d09b2efe05527eb",
      "timestamp": "2014-05-30 15:55:12",
      "rendered": "<li class=\"note col-xs-12 col-sm-6 col-lg-4\">...</li>",
      "status": 1,
      "id": 6
    },
    ... more notes ...
  ]
}
This means that we can now greatly simplify the homepage view, since everything will be happening using the API via Ajax:
# views.py -- yes, this is *it*.
from flask import render_template

from app import app

@app.route('/')
def homepage():
    return render_template('homepage.html')
Lots of JavaScript
In order to load the notes from the API, I ended up rewriting much of the original JavaScript code. In order to use the API we need to make Ajax requests to it, so let's start with a helper function makeRequest():
Editor.prototype.makeRequest = function(url, method, data, callback) {
  if (method == 'GET') {
    $.get(url, data, callback);
  } else {
    $.ajax(url, {
      'contentType': 'application/json; charset=UTF-8',
      'data': JSON.stringify(data),
      'dataType': 'json',
      'headers': {}, /* You might send authentication data here. */
      'success': callback,
      'type': method
    });
  }
}
Now that we can make requests, let's add code to retrieve lists of Note objects. Since the note's markdown content is rendered on the server, the JavaScript code has little to do besides adding the notes to the DOM and binding click handlers to allow deletion of the notes.
Here is the getList() method, which retrieves a list of notes using the REST API. If a particular page or a search term was specified, that information is relayed back to the API:
Editor.prototype.getList = function(page, search) {
  var requestData = {};
  var self = this;

  this.container.empty();

  if (page) requestData['page'] = page;
  if (search) requestData['content__ilike'] = '%' + search + '%';

  this.makeRequest('/api/note/', 'GET', requestData, function(data) {
    data.objects.reverse();
    $.each(data.objects, function(idx, note) {
      self.addNoteToList(note.rendered);
    });
    imagesLoaded(self.container, function() {
      self.container.masonry('layout');
    });
    self.updatePagination(data);
  });
}
The code to add a note to the DOM is hopefully straightforward. The note is added, click handlers are bound to the archive and delete buttons, and if there are any tasks associate with the note, we'll bind handlers to trigger when the checkbox is clicked.
Editor.prototype.addNoteToList = function(html) {
  var self = this;
  listElem = $(html);
  listElem.find('a.delete-note,a.archive-note').on('click', function(e) {
    e.preventDefault();
    self.changeNote($(this));
  });
  listElem.find('input[type="checkbox"]').on('change', function(e) {
    self.updateTask($(this));
  });
  listElem.find('img').addClass('img-responsive');
  this.container.prepend(listElem);
  this.container.masonry('prepended', listElem);
}
Since I use this app on my phone, it was important for me to add pagination so as not to spend lots of time transferring data over slow connections. Flask-Peewee's REST API comes with support for pagination, and even returns metadata to automatically generate the correct next/previous URLs (if they exist). Whenever a list of notes is loaded, a call is made to updatePagination, and this function in turn updates a state object which tracks the current page, whether there is a previous or next page, and whether there is a current search term. Here is how updatePagination is implemented:
Editor.prototype.updatePagination = function(response) {
  var meta = response.meta;
  window.location.hash = meta.page;
  this.state = {'page': meta.page};
  this.state['hasNext'] = meta.next != '';
  this.state['hasPrevious'] = meta.previous != '';
  this.state['search'] = $('input[name="q"]').val();

  var next = $('ul.pager li.next');
  if (this.state.hasNext) {
    next.removeClass('disabled');
  } else {
    next.addClass('disabled');
  }

  var previous = $('ul.pager li.previous');
  if (this.state.hasPrevious) {
    previous.removeClass('disabled');
  } else {
    previous.addClass('disabled');
  }
}
The pagination links are bound when the editor is initialized. Here is the code for binding the pagination, which as you can see, is looking at the internal state object to generate the links:
Editor.prototype.bindPagination = function() {
  var self = this;
  var makeHandler = function (key) {
    return function(e) {
      e.preventDefault();
      if ($(this).parent().hasClass('disabled')) return;
      if (key == 'next') {
        page = self.state['page'] + 1;
      } else {
        page = self.state['page'] - 1;
      }
      self.getList(page, self.state['search']);
    }
  }
  $('ul.pager li.next a').on('click', makeHandler('next'));
  $('ul.pager li.previous a').on('click', makeHandler('previous'));
}
Creating new notes
To create a new note, we'll just POST the content to the API endpoint and let flask-peewee handle the rest. There's a little bit of work we need to do to correctly serialize the value of the reminder field, but that's about it. Flask-peewee returns a JSON representation of the new note, so we can immediately add the new note to the DOM using the addNoteToList method:
Editor.prototype.addNote = function() {
  if (!this.content.val()) {
    this.content.css('color', '#dd1111');
    return
  }

  var note = {'content': this.content.val()};
  if (this.reminder.is(':visible') && this.reminder.val()) {
    // Fix any bizarre date formats.
    var dateTime = this.reminder.val().replace('T', ' ').split('Z')[0];
    if (dateTime.split(':').length == 2) {
      dateTime = dateTime + ':00';
    }
    note['reminder'] = dateTime;
  }
  var self = this;
  this.content.css('color', '#464545');
  this.makeRequest(this.form.attr('action'), 'POST', note, function(data) {
    self.content.val('').focus();
    self.resetReminder();
    self.addNoteToList(data.rendered);
  });
}
All the JavaScript
Unfortunately, the entire JavaScript file is just a bit too long for me to post it inline (~200 LOC). If you'd like, you can view the source code in this gist. Things I did not cover in this post:
- Initializing the editor.
- Reminder date widget.
- Search event handler.
- Archive / Delete note event handlers.
- Task checkbox event handler.
- Markdown helpers (covered in previous post).
Templates
The note.html template partial needs to be updated to display the checkbox task widgets and the reminder information. Here is the updated note.html:
<li class="note col-xs-12 col-sm-6 col-lg-4">
<div class="panel panel-{% if note.reminder %}warning{% else %}primary{% endif %}">
<div class="panel-heading">
<a class="btn btn-danger btn-xs delete-note pull-right" data-note="{{ note.id }}" href="/api/note/{{ note.id }}/">×</a>
<a class="btn btn-info btn-xs archive-note pull-right" data-note="{{ note.id }}" href="/api/note/{{ note.id }}/">a</a>
{{ note.timestamp.strftime('%b %d, %Y - %I:%M%p').lower() }}
</div>
<div class="panel-body">
{{ note.html() }}
{% for task in note.get_tasks() %}
<div class="checkbox">
<label>
<input id="task-{{ task.id }}" {% if task.finished %}checked="checked" {% endif %}name="task" type="checkbox" value="{{ task.id }}">
{{ task.html() }}
</label>
</div>
{% endfor %}
</div>
{% if note.reminder %}
<div class="panel-footer">
<span class="glyphicon glyphicon-time"></span>
{{ note.reminder.strftime('%m/%d/%Y %I:%M%p') }}
</div>
{% endif %}
</div>
</li>
The homepage.html template also changed to accomodate the search input and pagination links. Since this template is a bit long I won't include it's contents in this post, but you can find the code in this gist.
Live demo
You can check out a live demo at http://beetlejuicer.pythonanywhere.com/ (thanks to Python Anywhere for the free hosting!). As you might expect, the reminders will not actually send an email anywhere, but feel free to try creating one.
Thanks for reading
Thanks for taking the time to read this post, I hope you found it interesting. If you have any comments or suggestions on ways I could improve this project I'd love to hear them - please leave a comment below.
Update: check out the next post in the series, where we add robust full-text search to the note-taking app.
Links
- Live demo
- Source code for notes app
- Source code from previous post
- Huey, peewee and flask-peewee documentation
Other posts in the series:
- Part 1: Building a little note-taking app with Flask and Peewee
- Part 3: Adding full-text search using SQLite's search engine extension
Or simply look at all of the saturday-morning hack posts.
Comments (1)
Commenting has been closed.
Anne Owen | may 31 2014, at 07:03pm
HUEY!